Wells don't stay the same. Production declines. Water cut increases. Fluid levels shift. The rod string you designed two years ago might not be the right fit today.
PetroBench's version history lets you model these changes over time without losing your original work. Create a new version, adjust the parameters, run the simulation, and compare results side by side.
Why well conditions change
Every producing well moves through stages. What starts as a clean, high-rate producer gradually shifts as reservoir pressure drops and fluid composition changes. Three things matter most for rod lift design:
- Declining production rates. Lower flow rates change the load profile on every stroke. A string designed for 200 BFPD handles differently at 80 BFPD.
- Increasing water cut. More water means heavier fluid. Specific gravity shifts, which directly impacts rod loading and peak polished rod load.
- Fluid level changes. As reservoir pressure drops, fluid level falls. Pump submergence decreases, and you risk incomplete fillage or gas interference.
Modeling these changes isn't optional. It's how you avoid rod failures, optimize pump efficiency, and extend the life of your equipment.
Create simulation versions to track changes
Every simulation in PetroBench supports version history. When conditions change, don't modify your original design. Create a new version instead.
How it works
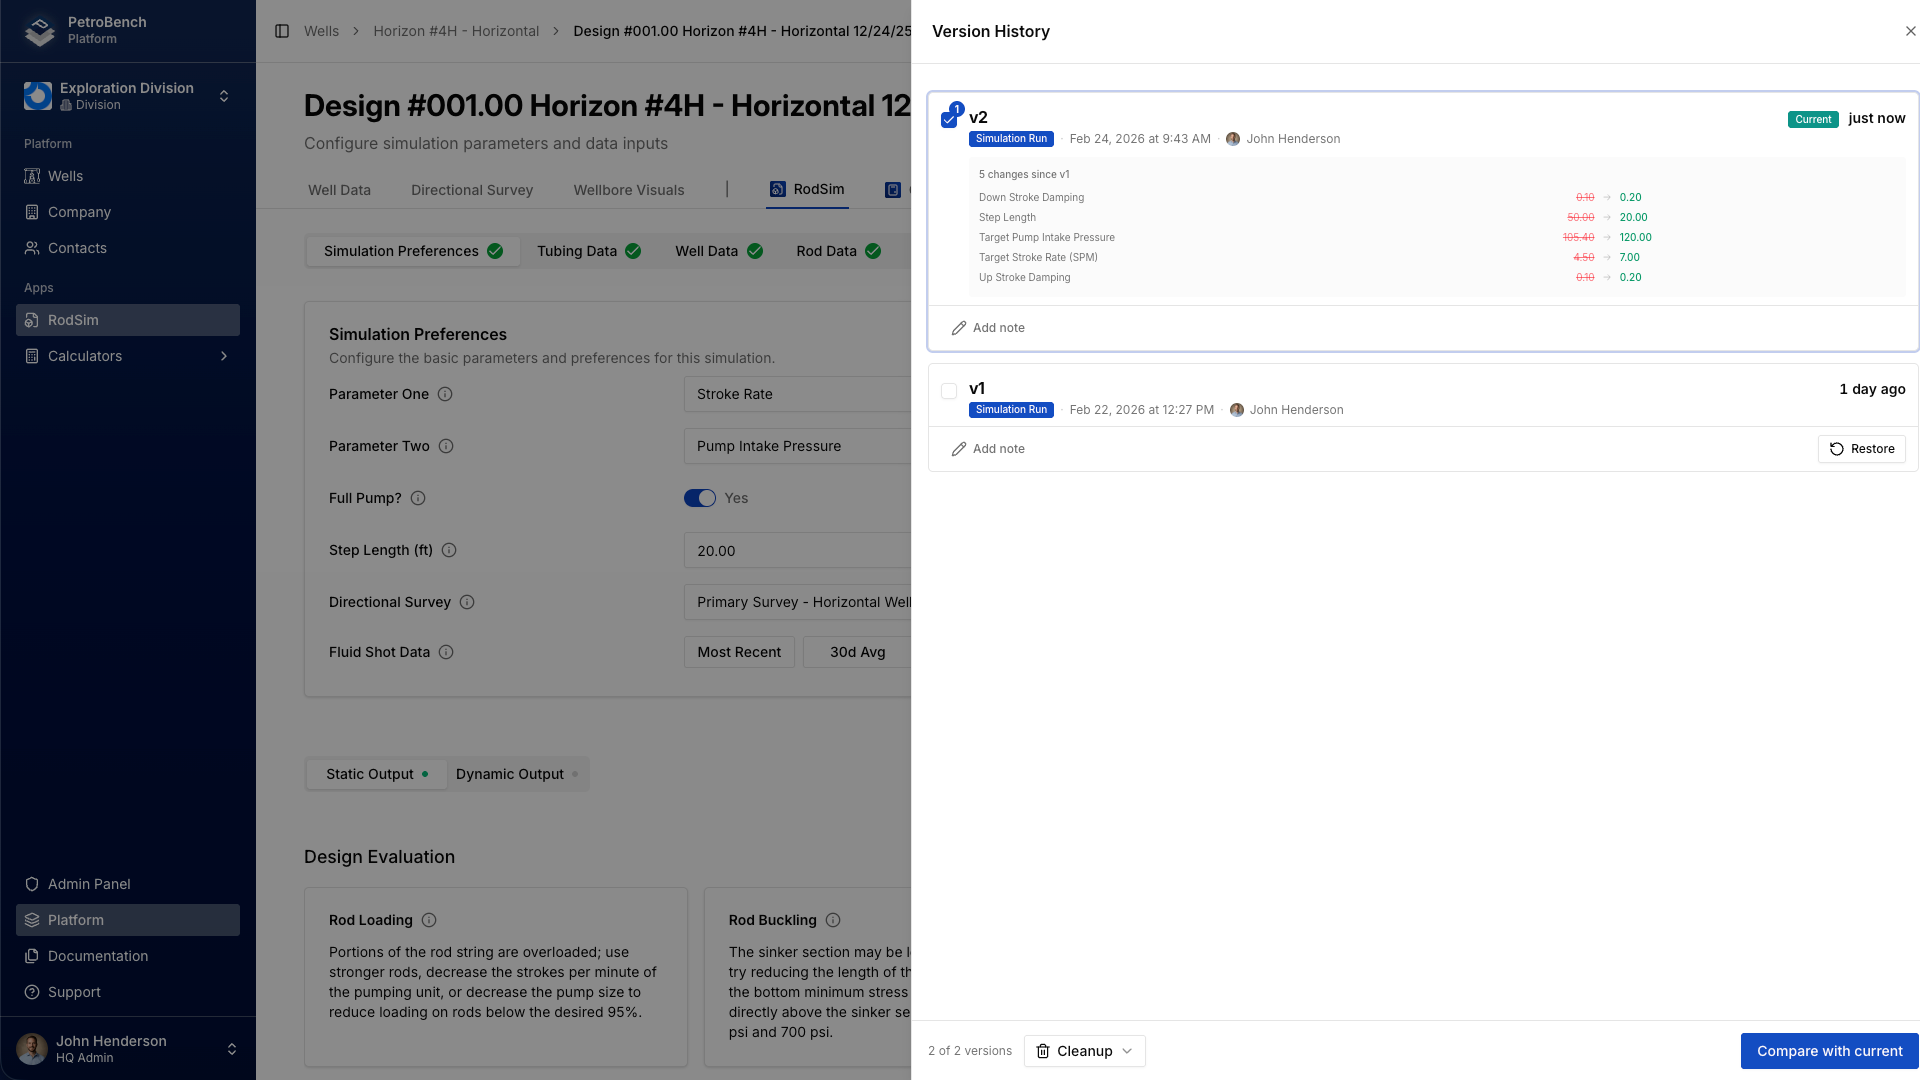
Open your simulation and click RodSim in the top navigation. This opens the version history panel, where you can see every version of your design.
Each version captures a complete snapshot: rod string configuration, well data, fluid properties, and operating parameters. When you create a new version, PetroBench copies everything from the current state so you have a clean starting point.
Typical versioning workflow:
- v1: Initial well conditions at completion. Your baseline design.
- v2: Six months in. Production has declined, water cut is up. Adjust fluid properties and re-run.
- v3: Year two. Fluid level has dropped significantly. Time to evaluate whether the current rod string still works or needs modification.
Document decisions with version notes
Numbers alone don't tell the full story. Version notes let you record why a change was made, not just what changed.
Click on any version in the history panel to add a note. Keep it brief and specific:
"Updated water cut to 65% based on March production report. Fluid SG adjusted from 0.95 to 1.02."

This matters when someone else picks up the well, or when you revisit it six months later. The note connects the simulation to the real-world event that triggered it.
Adjust fluid properties for changing conditions
After creating a new version, update the parameters that reflect current conditions. The most common adjustments:
- Water cut: Directly affects fluid specific gravity. Higher water cut means heavier fluid column and increased rod loading.
- Fluid level (pump intake pressure): Lower fluid levels reduce submergence. Update the pump intake pressure or fluid level depth to match current conditions.
- Target stroke rate (SPM): With lower production, you may want to slow the pump. Adjust strokes per minute to match the reduced flow rate.
- Gas-liquid ratio: As pressure declines, free gas at the pump increases. Update the GOR and solution gas parameters to reflect current reservoir behavior.
Make all your changes, then run the simulation. PetroBench recalculates the full rod string analysis with the updated inputs.
Compare versions side by side
Once you have multiple versions, use version compare to see exactly what changed. Open the version history panel, select two versions, and click Compare with current.
The compare view highlights differences across every section of the simulation. Changed values appear in a side-by-side layout so you can quickly spot what moved.

Use the tab navigation to focus on specific sections. The Simulation Preferences tab shows changes to operating parameters like stroke length and pump intake pressure. The Rod Data tab shows any modifications to the rod string itself.
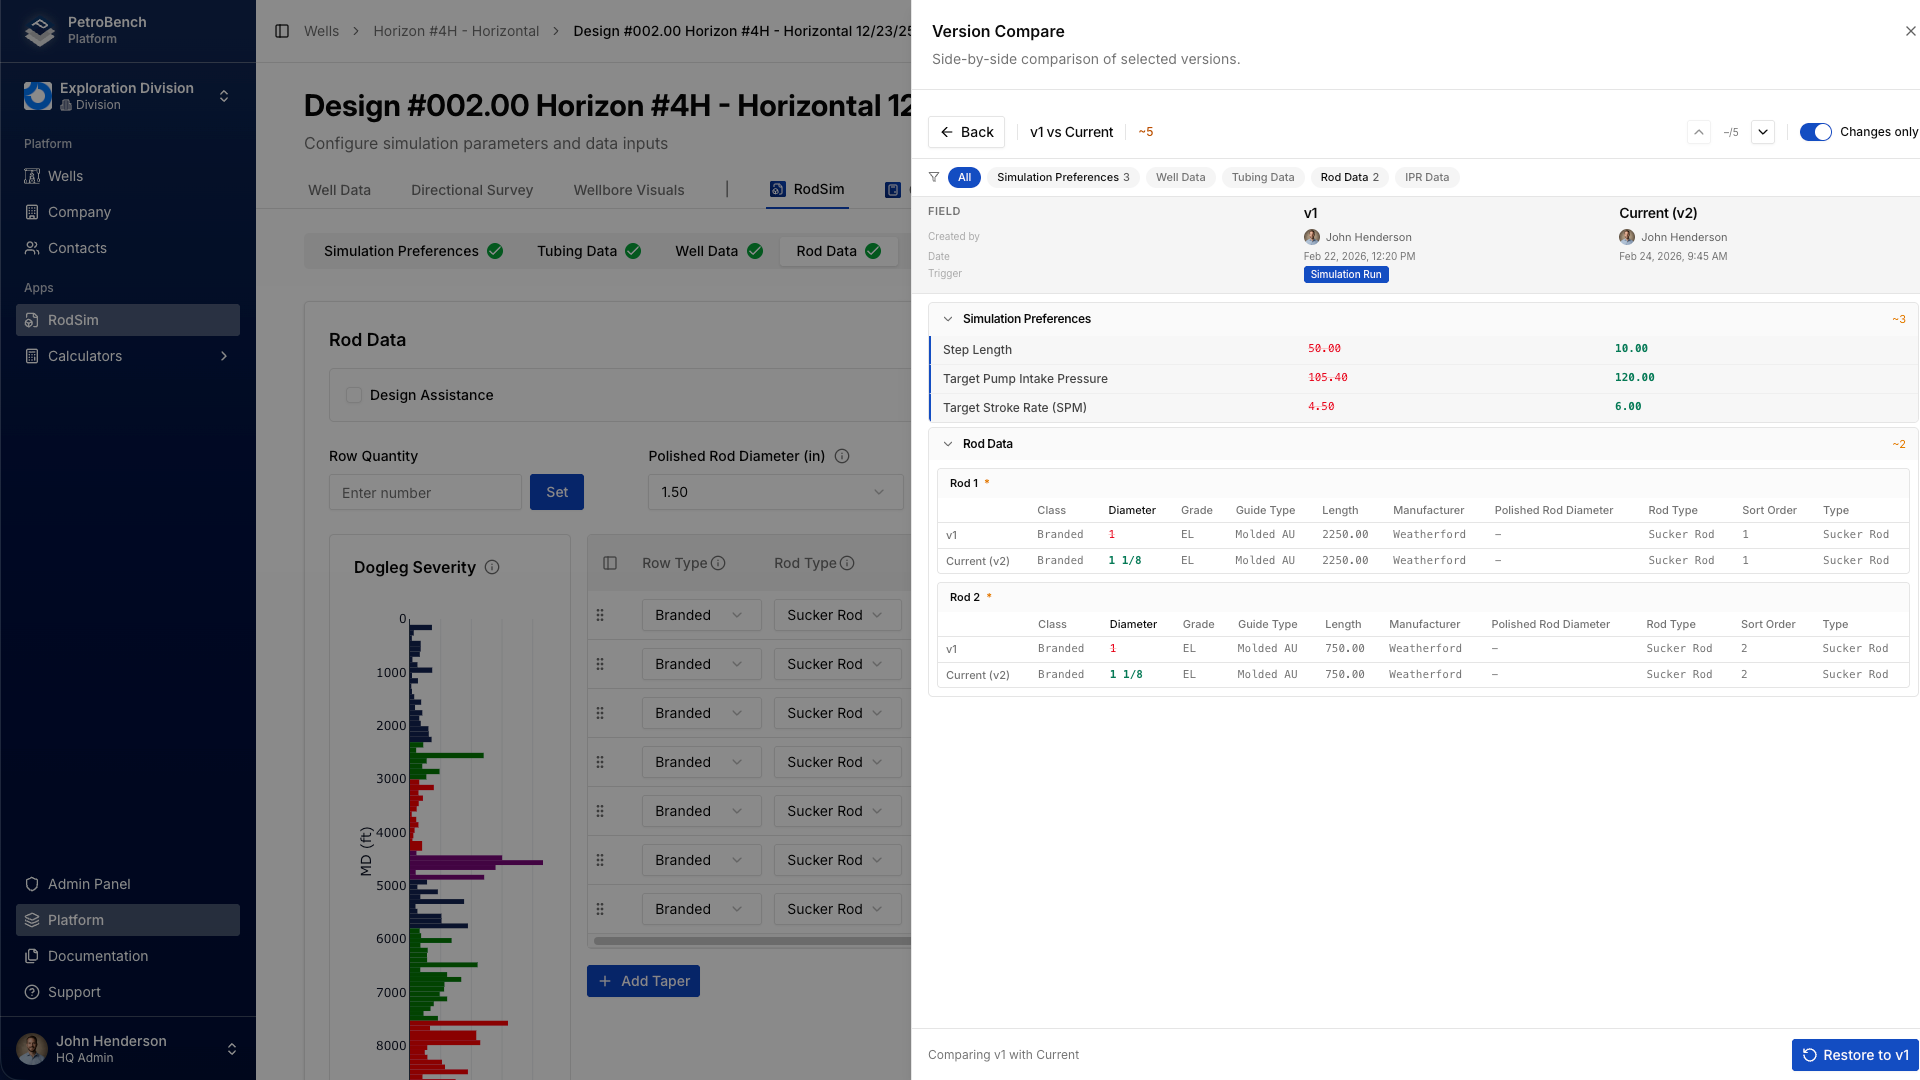
This is particularly useful for auditing. When you need to explain why a rod string was changed, the version compare gives you a clear, documented trail of every modification.
Evaluate multiple scenarios with comparisons
Version history tracks changes to a single design over time. But sometimes you need to evaluate entirely different approaches: different rod strings, different stroke rates, different pump sizes.
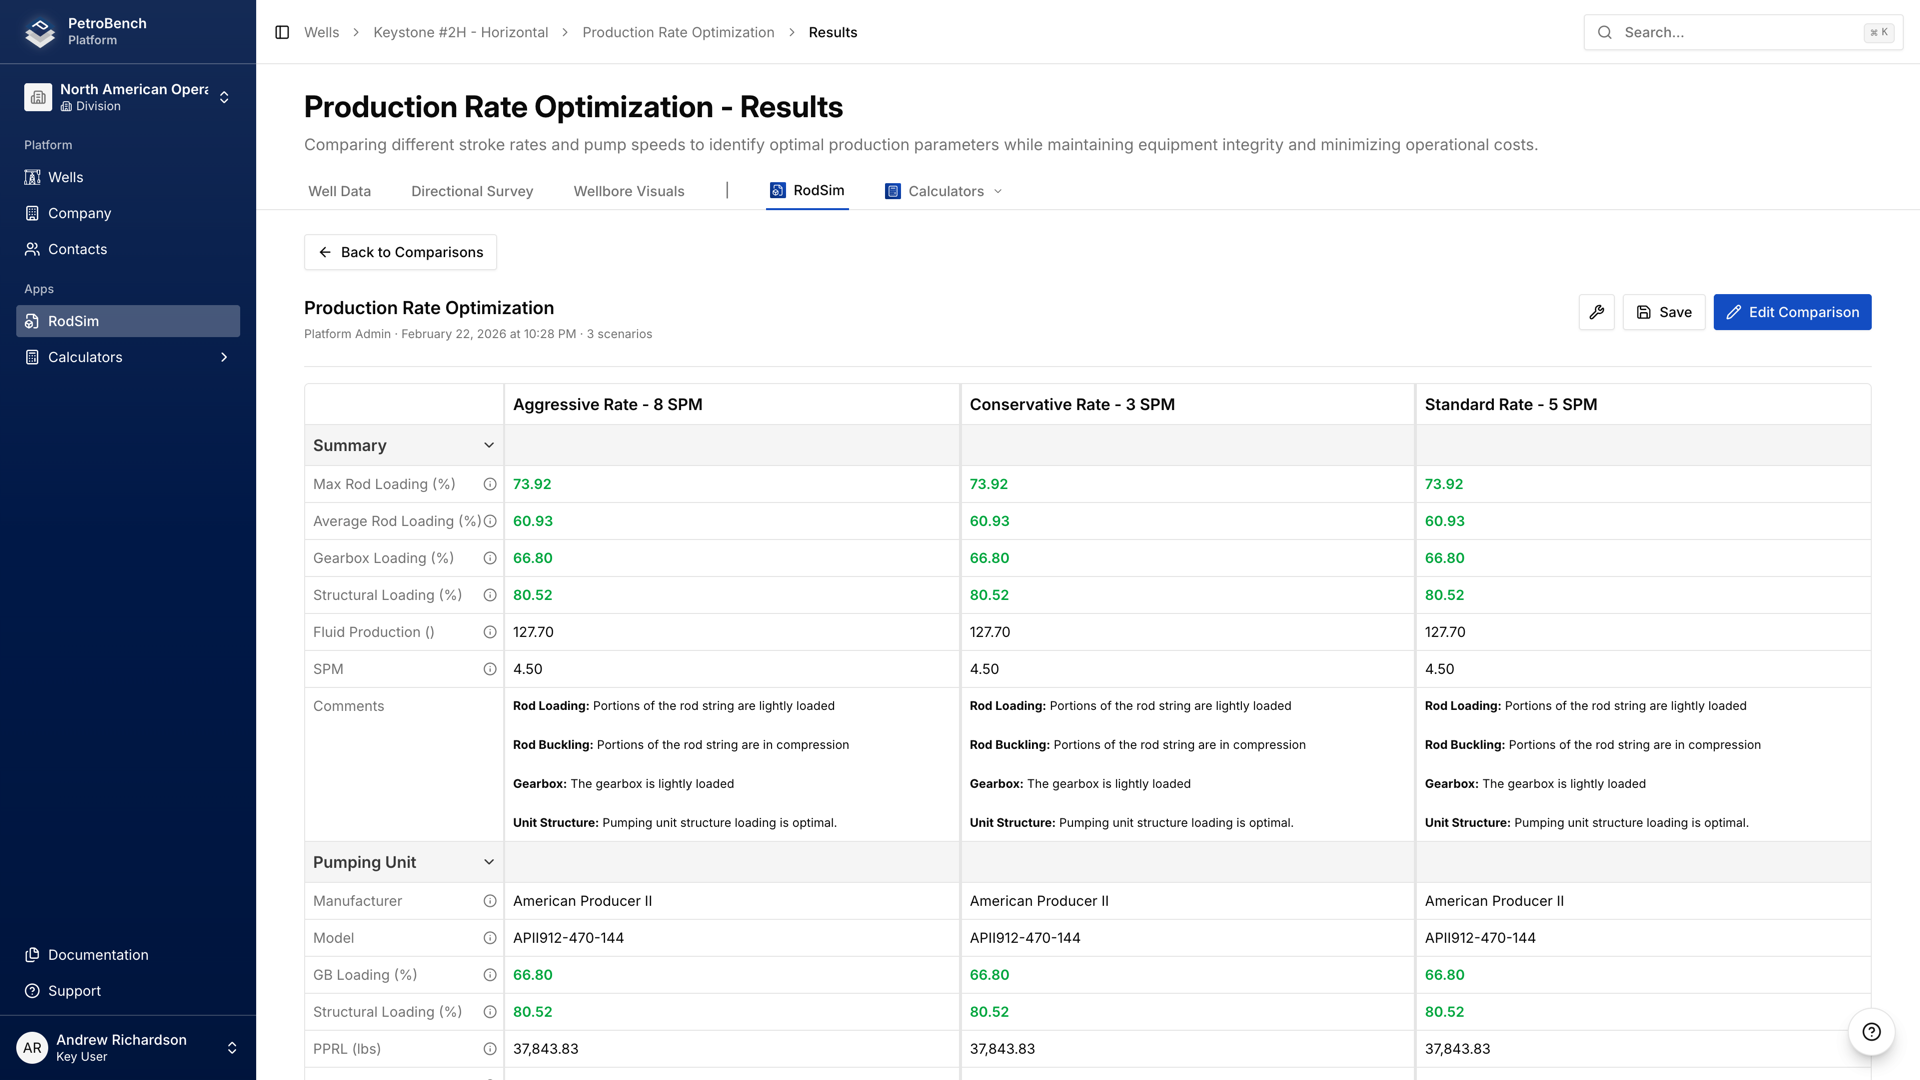
That's where the comparison view comes in. Create multiple designs within the same well, run them all, and compare results in a single table.
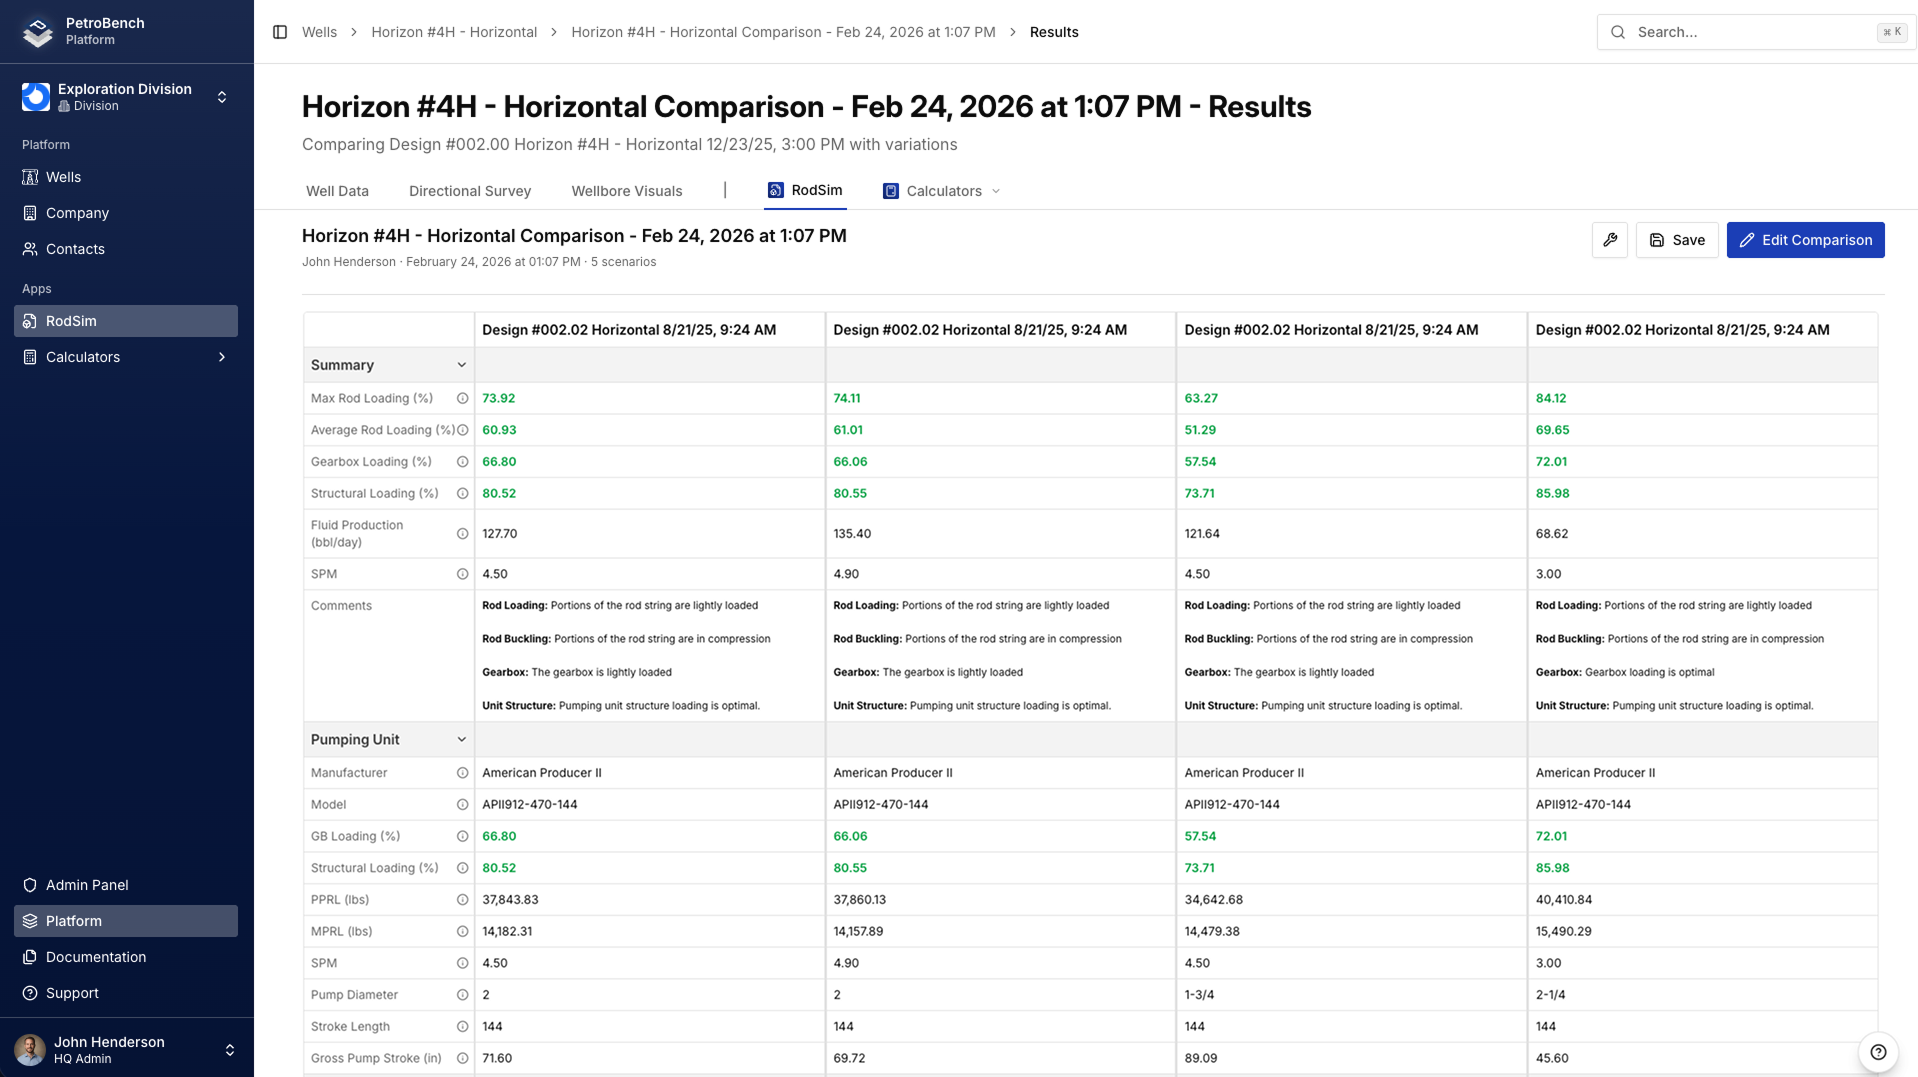
The results summary shows the key metrics side by side: max rod loading, peak polished rod load, fluid production, and rod buckling status for each design.
A practical example: you know your well's water cut will increase from 40% to 70% over the next year. Create three designs representing current conditions, mid-life, and late-life. Run all three, compare the results, and determine if your current rod string can handle the full range or if you need to plan an intervention.
Putting it together
Here's the complete workflow for modeling changing well conditions:
- Start with your baseline. Run your initial simulation with current well conditions. This becomes v1.
- Create a new version when conditions change. Don't edit v1. Create v2 and update the parameters.
- Add a version note. Document what changed in the field and why you're updating the simulation.
- Run and compare. Use version compare to see how results shifted. Check rod loading, buckling status, and production rates.
- Evaluate alternatives if needed. If the current string is outside acceptable limits, use the comparison view to test different configurations.
- Repeat as the well evolves. Build a version history that mirrors the well's production life. Each version is a snapshot you can return to at any time.
Wells change. Your simulations should change with them. Version history and comparisons give you the tools to track those changes systematically, make informed decisions, and keep a clear record of every step along the way.