PetroBench is built for teams. Whether you're managing a handful of engineers or coordinating across global divisions, the Admin Panel gives you full control over who can access what, and where.
Open the Admin Panel
Navigate to the Admin Panel from the left sidebar. The dashboard shows your organization at a glance: total team members, locations, recent wells, and active simulations.
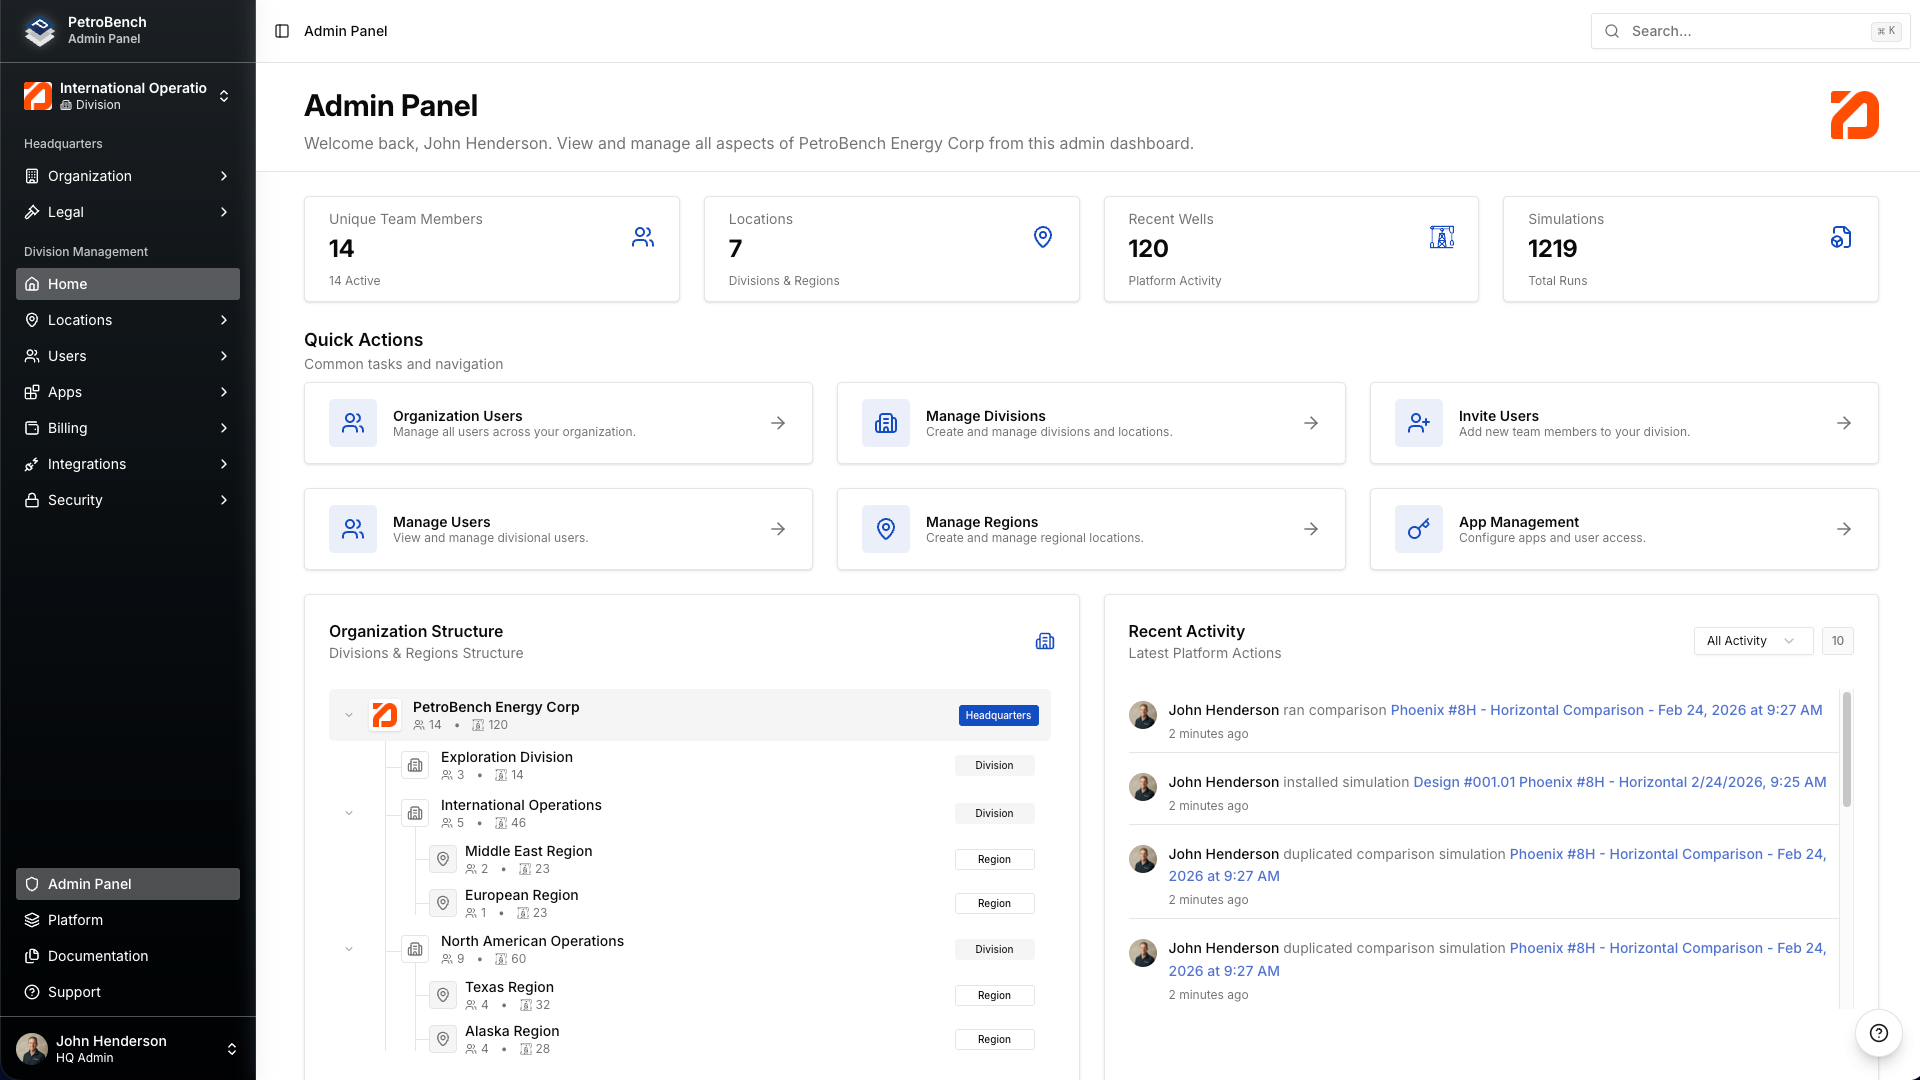
From here, use Quick Actions to jump directly to user management, divisions, regions, or app settings.
Invite team members
- Click Invite Users from the dashboard Quick Actions, or go to Users in the sidebar.
- Enter the new member's email address.
- Select a role for the user.
- Send the invitation.
PetroBench sends an invitation link that expires after 7 days. When the user accepts, they create their account and land in your organization automatically.
You can invite multiple users at once. Each invitation counts toward your active license seats.
Understand roles and permissions
PetroBench uses role-based access control with four core roles. Each role defines exactly what a user can do across every app in the platform.
- Admin
Full access. Can create and delete wells, edit all data, manage users, configure organization settings, and assign licenses. Typically reserved for team leads or engineering managers.
- Engineer
Standard working role. Can create wells, import data, edit well details, run simulations, and view results. Can't manage users or billing.
- Advisor
Read–write access to well data and simulation results, but can't create or delete wells. Useful for senior engineers who review work without owning specific assets.
- Reviewer
Read-only access. Can view wells, data, and simulation results, but can't modify anything. Ideal for managers or stakeholders who need visibility without edit rights.
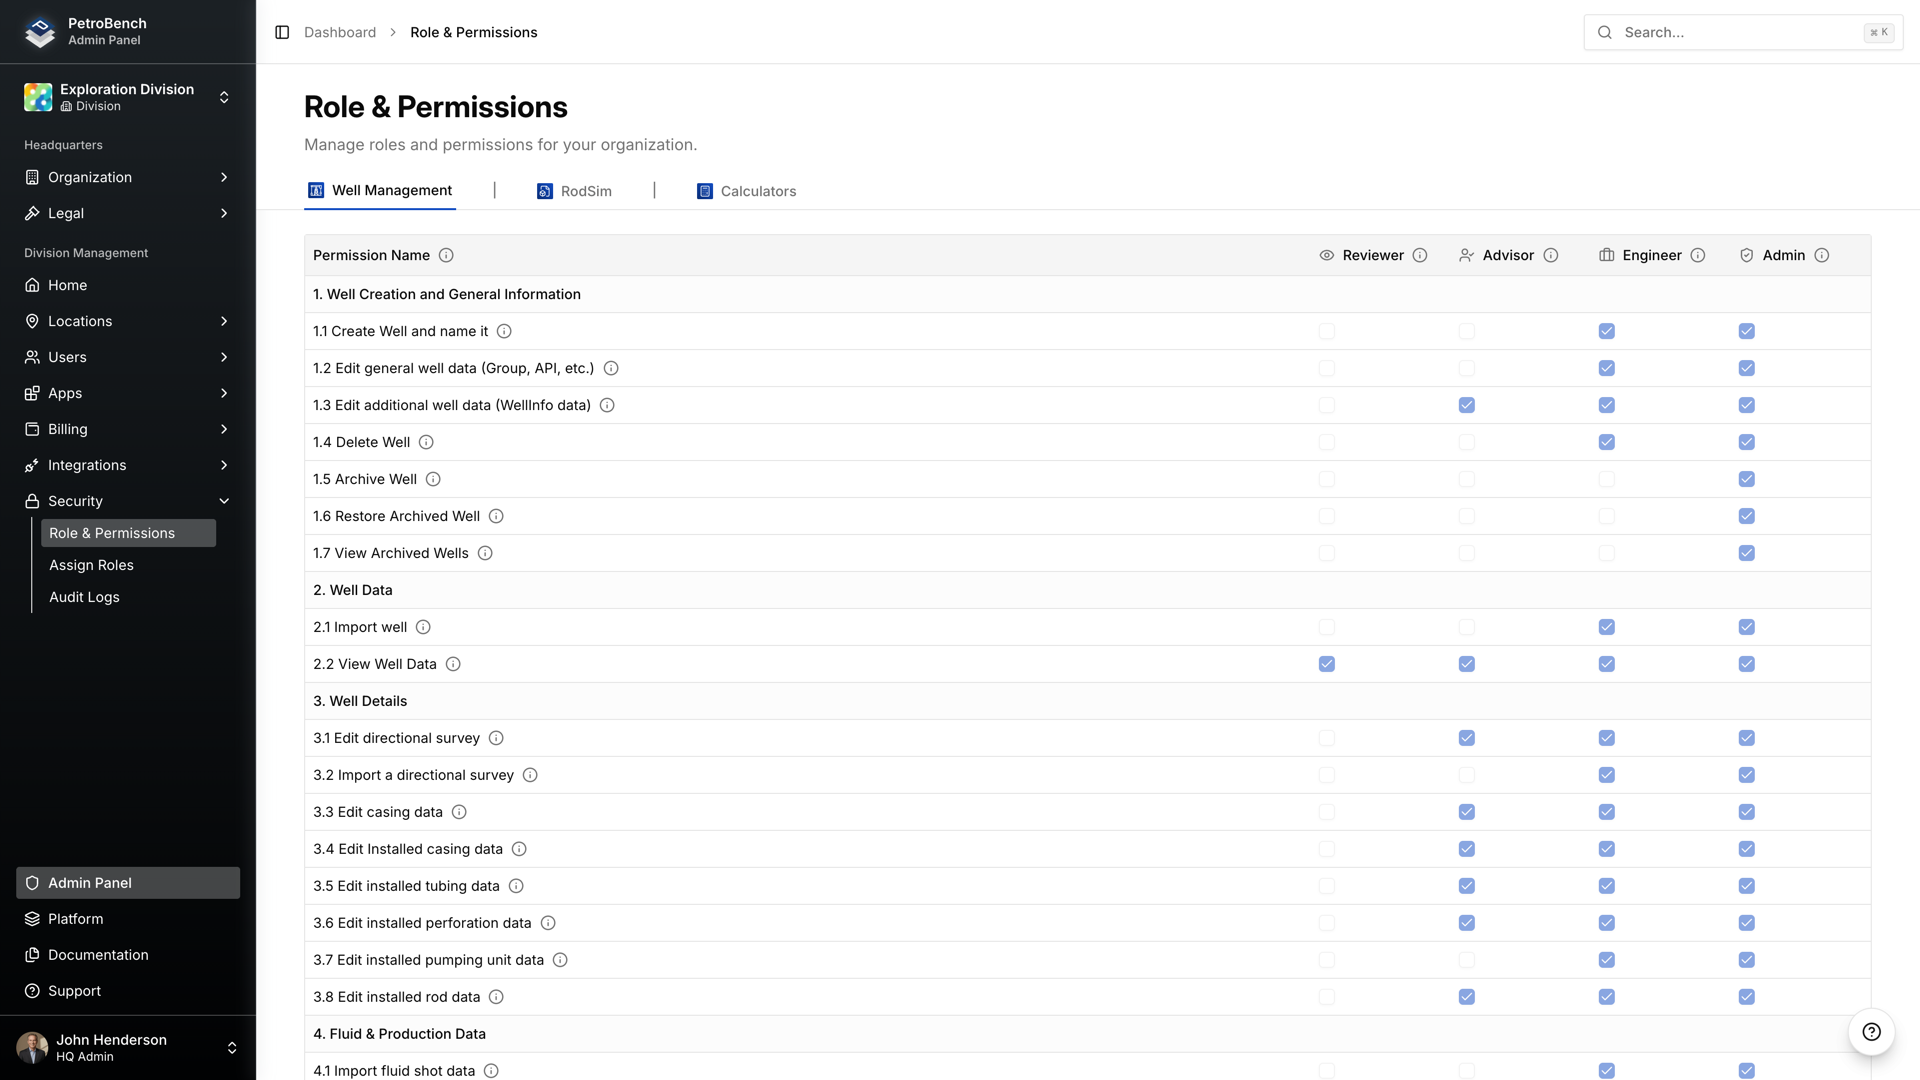
Permissions are granular. The Role & Permissions matrix breaks down every action across:
- Well Management
- RodSim
- Calculators
so you know precisely what each role allows in each app.
Assign roles to users
- Go to Security > Assign Roles in the sidebar.
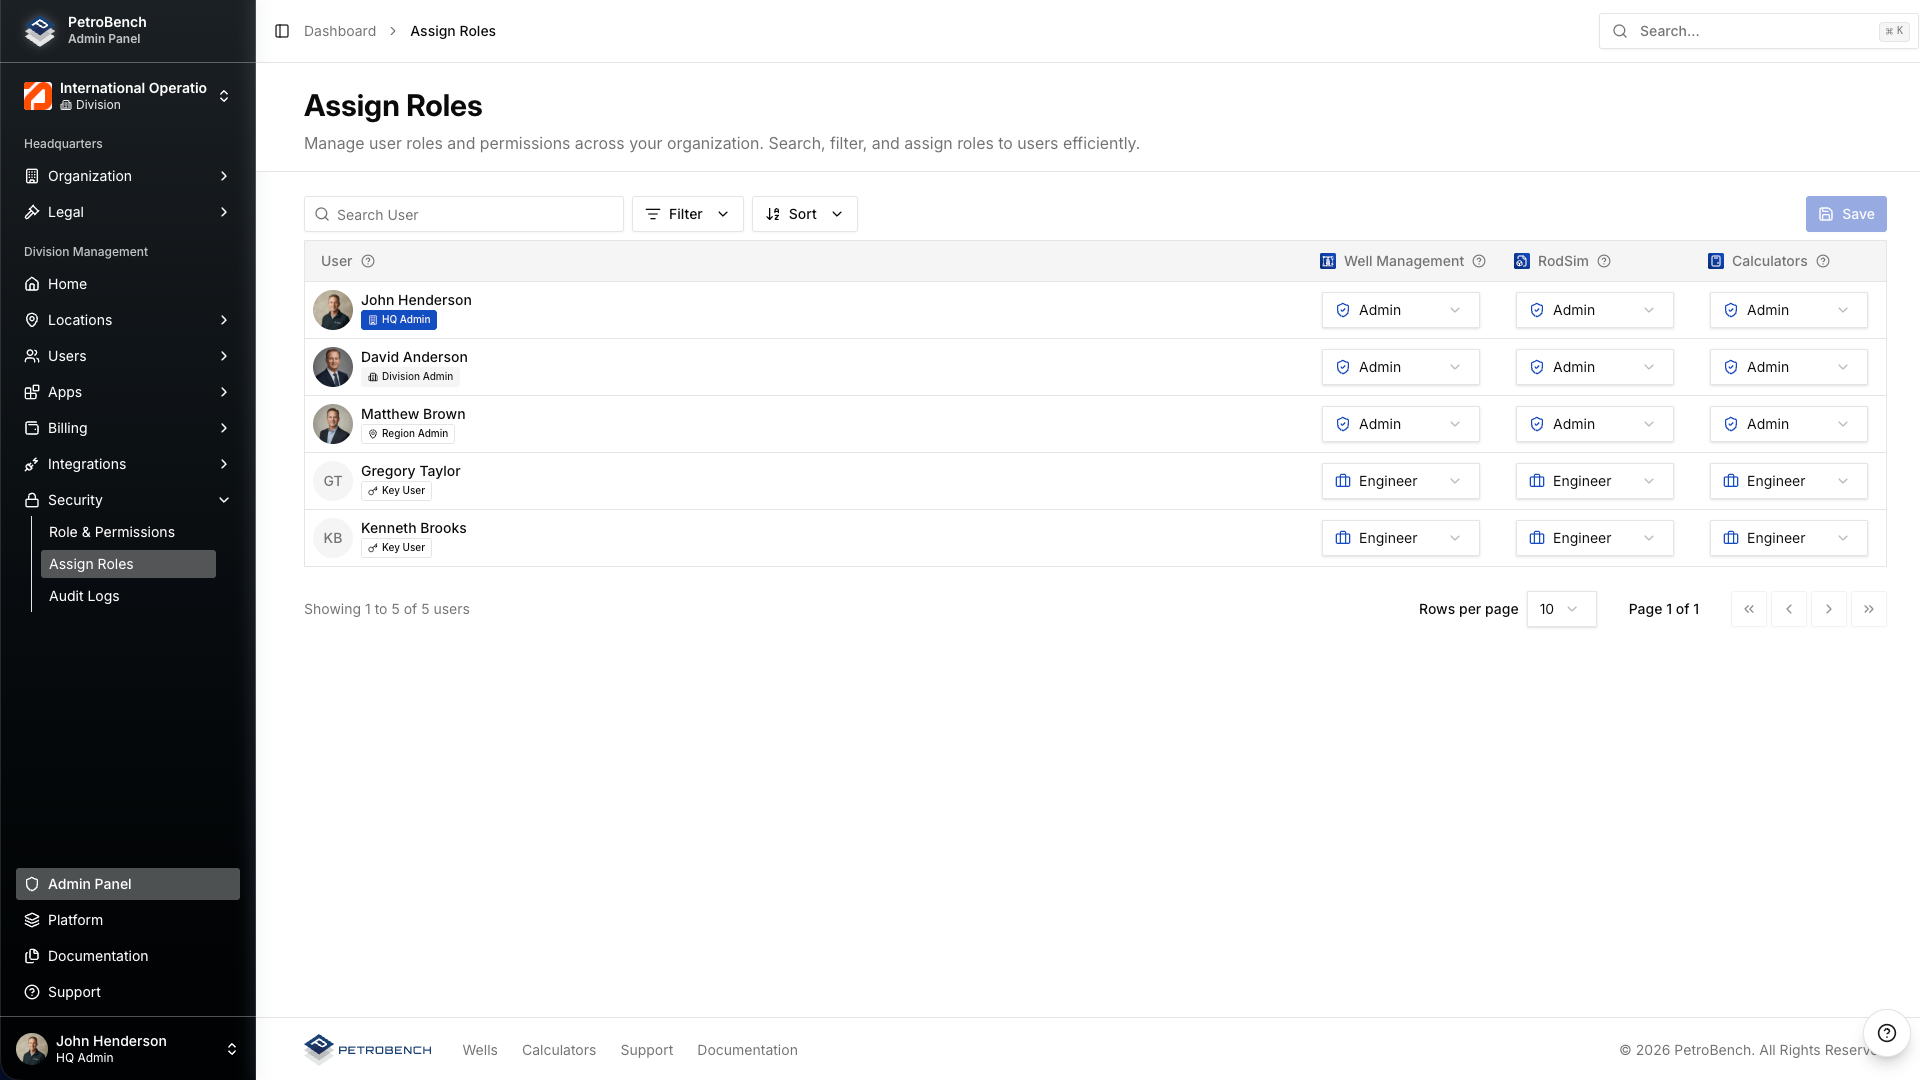
- Review the list of users and their current role per app.
- To change a role, click the dropdown next to a user and select the new role.
Changes take effect immediately. You can filter and sort users to find specific team members quickly.
A single user can hold different roles per app. For example:
- Engineer in Well Management
- Reviewer in Calculators
Set up your organization hierarchy
PetroBench organizes teams into a three-tier hierarchy:
HQ > Divisions > Regions
This structure controls data visibility and access scope.
Create divisions
Divisions are the top-level grouping below HQ. They typically represent business units, operating areas, or subsidiaries.
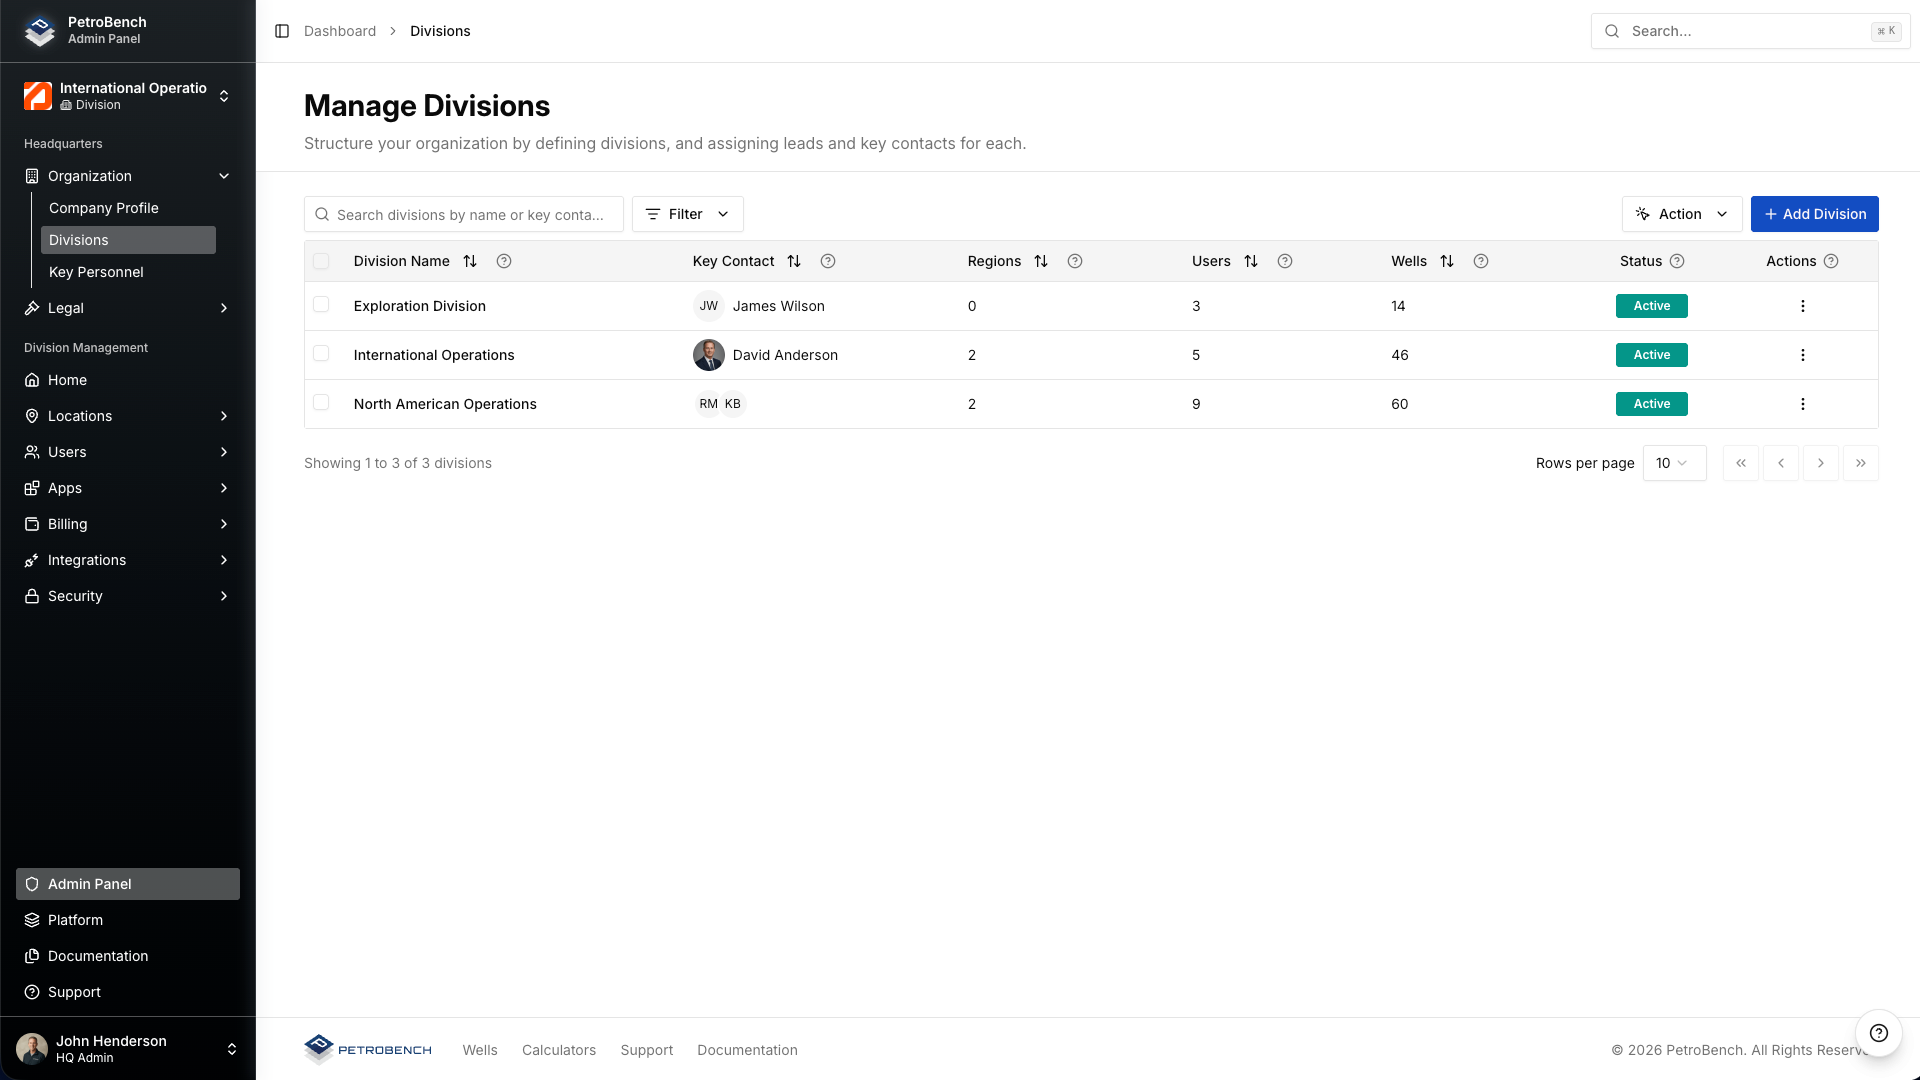
- Navigate to Organization > Divisions in the sidebar.
- Click + Add Division.
- Enter division details and assign:
- A division lead
- A key contact
Each division tracks its own:
- User count
- Region count
- Total wells
Create regions
Regions sit inside divisions and represent geographic operating areas.
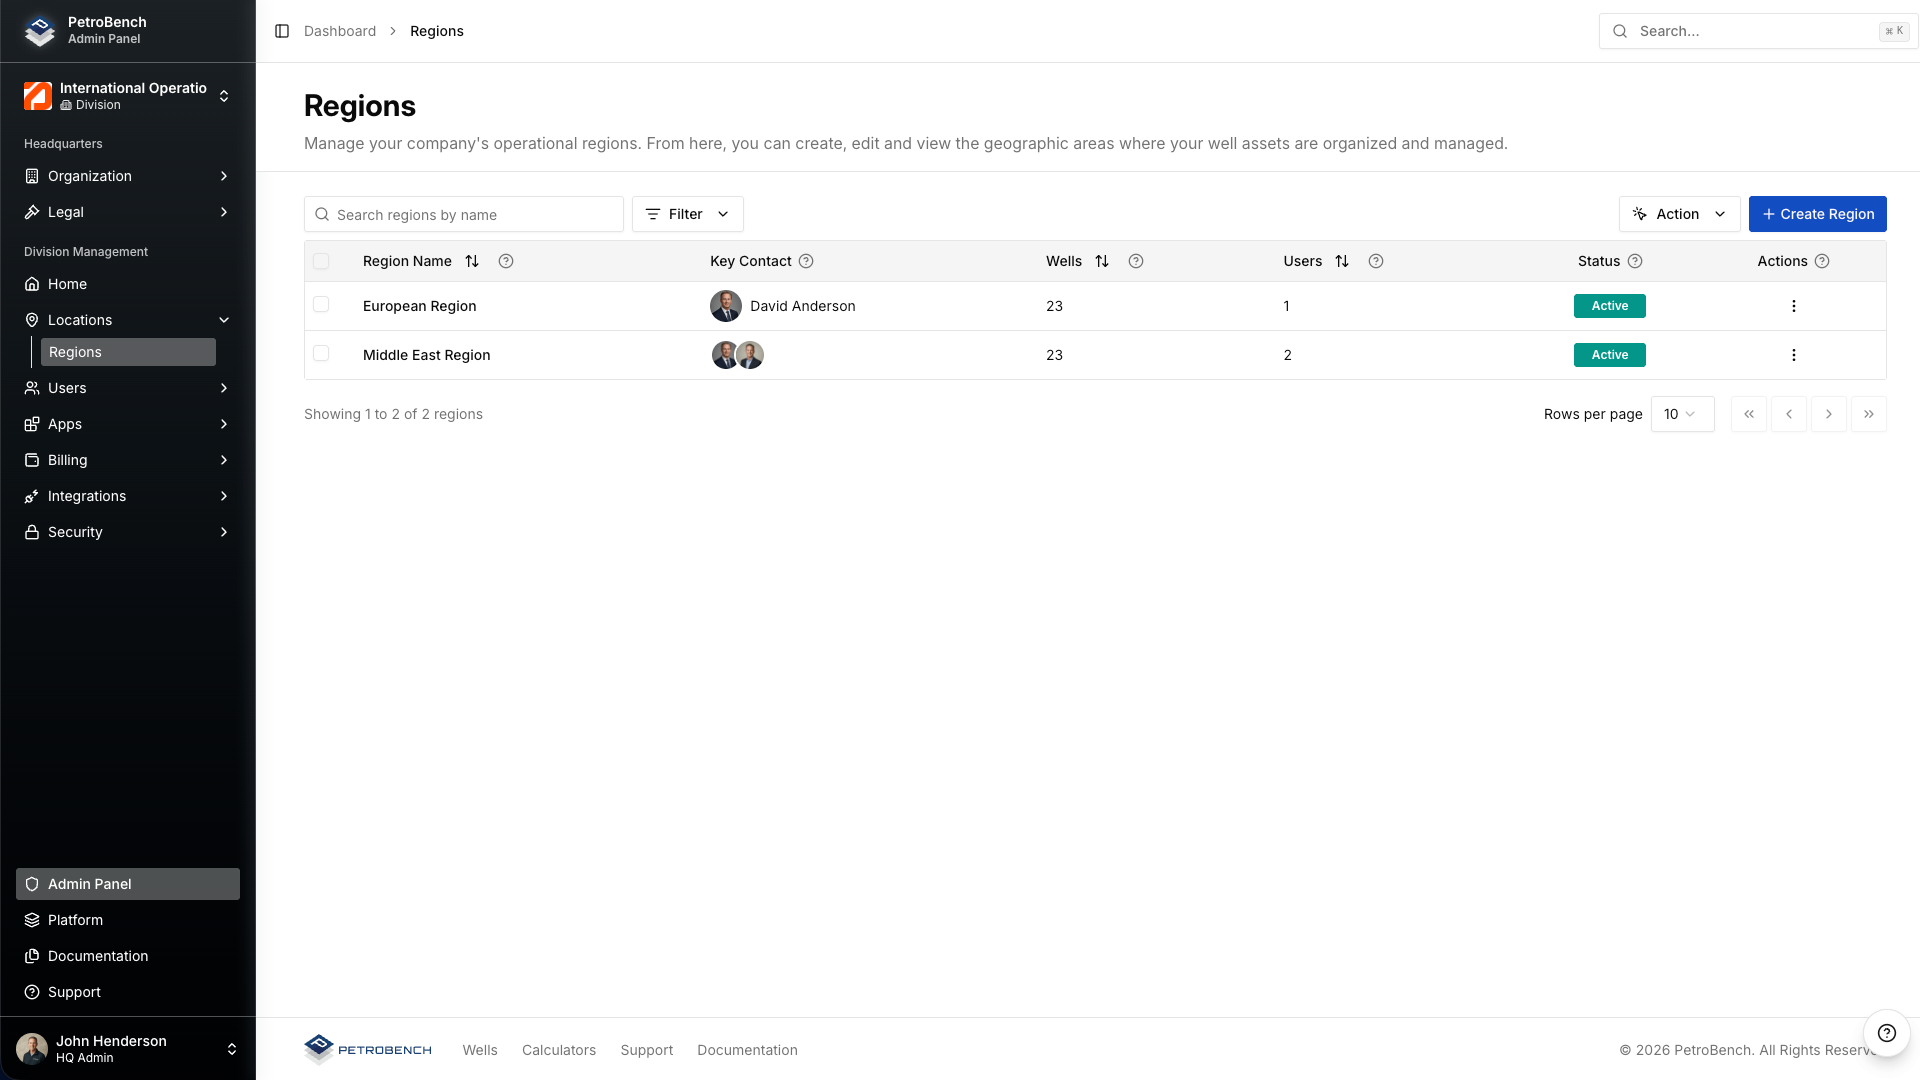
- Within a division, go to Locations > Regions.
- Click + Create Region.
- Assign a key contact.
Wells are tied to regions, so this structure determines which team members see which assets.
Assign users to divisions and regions
When you invite a user, assign them to a specific division. Within that division, you can further scope their access to one or more regions.
- Users at the division level can see all regions within that division.
- Users scoped to a specific region only see wells and data in that region.
- HQ-level Admins see everything across all divisions and regions.
Manage licenses
PetroBench uses per-seat licensing, broken down by app.
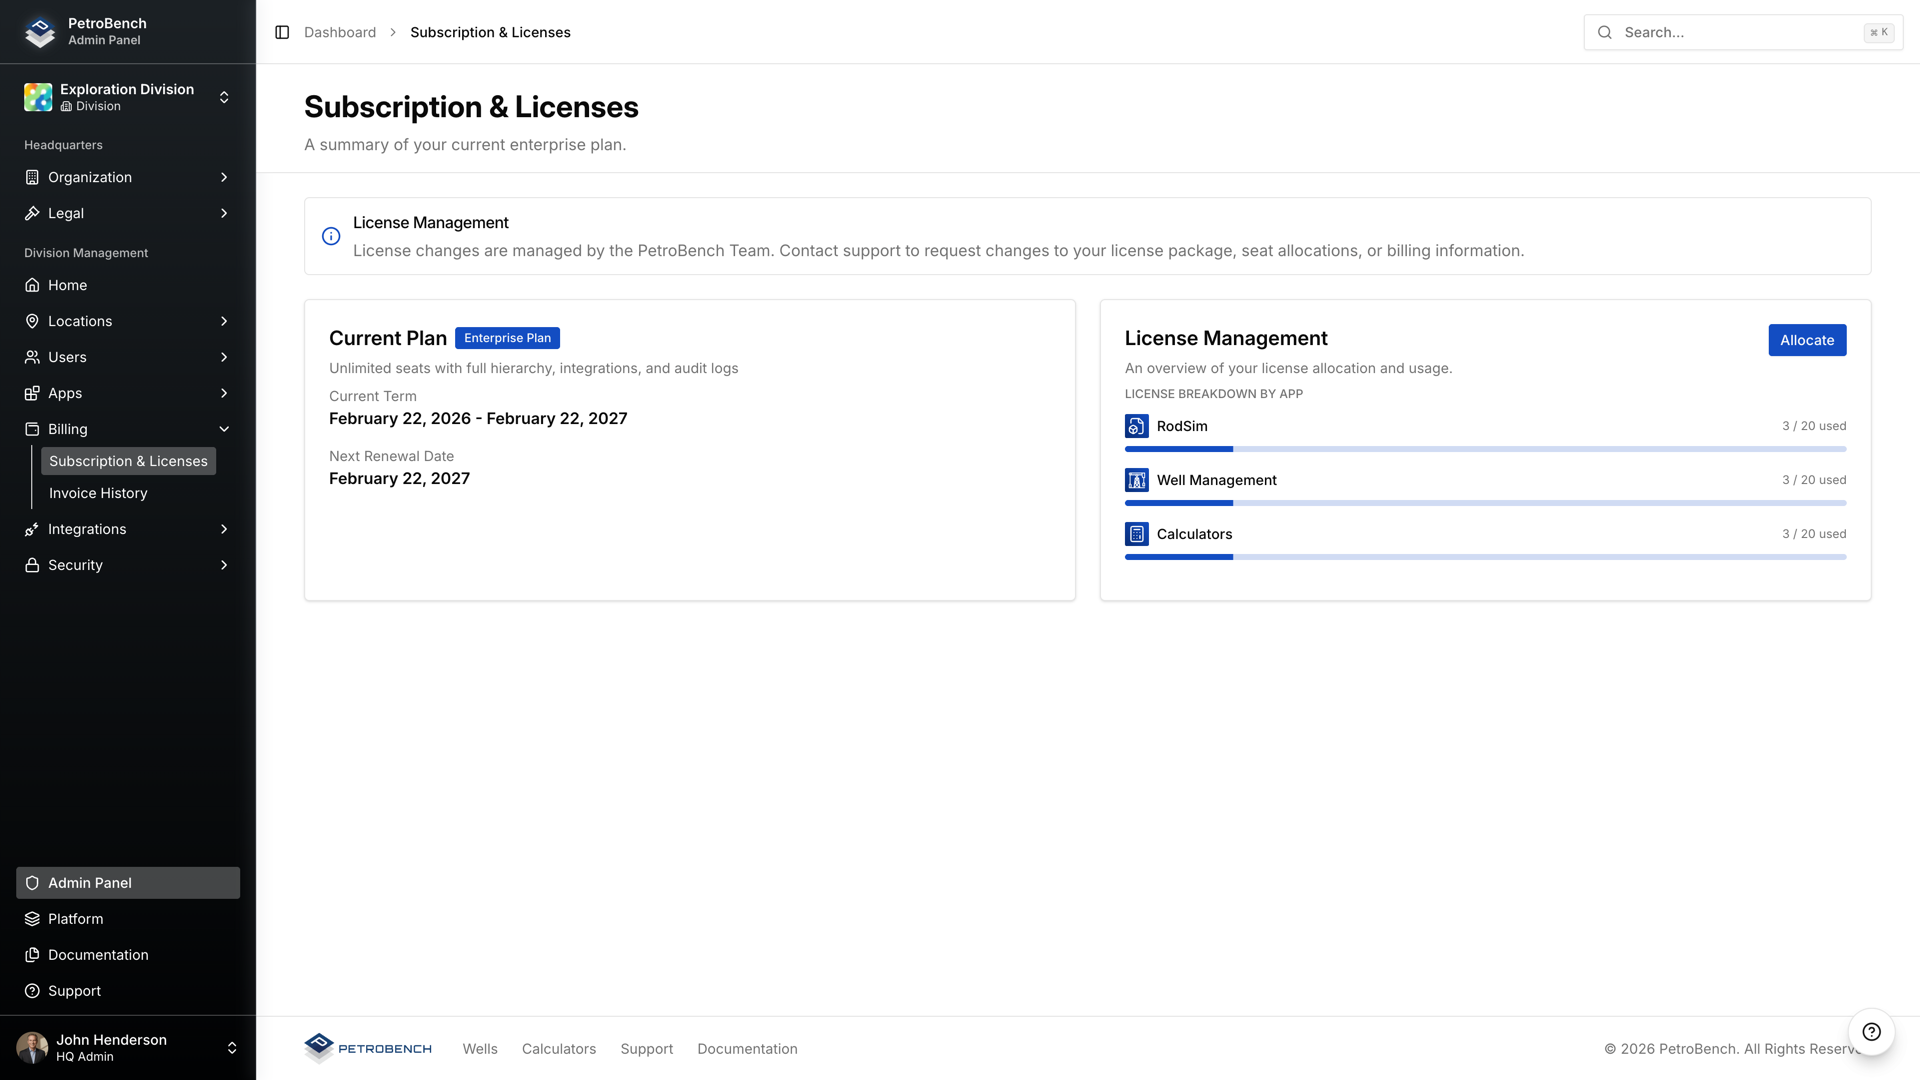
- Navigate to Billing > Subscription & Licenses.
- Review your:
- Plan tier
- Renewal date
- Seats used per app
Apps tracked include:
- Well Management
- RodSim
- Calculators
Click Allocate to redistribute seats across apps as your team's needs change.
License changes (additional seats or package adjustments) are managed by the PetroBench team. Contact support to request updates to your subscription.
How collaboration works in practice
Once your team is set up, collaboration happens naturally across the platform.
Shared wells
Every well belongs to a region. Anyone with access to that region can view or edit the well based on their role. No manual sharing required.
Version history
PetroBench tracks changes to well data and simulation inputs. You can see who modified what and when, making it easy to audit work and revert if needed.
Simulation assignments
Engineers run simulations against wells in their assigned regions. Results are visible to everyone with access to that well, so reviewers and advisors stay informed without extra steps.
Real-time activity
The Admin Panel dashboard shows recent activity across your organization, including new wells, completed simulations, and data imports.
Best practices for team setup
Start with divisions first. Map your org chart to PetroBench divisions before inviting users. This avoids reassigning people later.
Use the principle of least privilege. Assign Reviewer or Advisor roles by default. Promote to Engineer or Admin only when needed.
Designate one or two HQ Admins. Keep the Admin role limited. Most engineers don't need user management or billing access.
Scope users to regions. Avoid giving everyone division-wide access unless they genuinely need it. Tighter scoping means less noise and cleaner audit trails.
Review roles quarterly. As projects shift and people move between teams, roles can drift. A quick review of the Assign Roles page keeps permissions accurate.
Plan license allocation early. Know which apps each team member needs before inviting them. This prevents over-allocation and keeps costs predictable.